Newsletters are an important part of staying connected and engaged with your audience. However, sending the same message to your entire email list may not be the most effective way to engage your subscribers. Creating various “subscriber groups” is a valuable tool that allows you to customize your content for your target audience, speaking to each group’s specific interests, which results in higher engagement and sales conversion rates.
Why Create Subscriber Groups?
Utilizing subscriber groups allows for a more personalized approach that can enhance user experience and deliver relevant and valuable content to your followers. If the content you are sending matters to them, they will be more inclined to make a purchase, share the content with friends, or stay engaged with your brand. This personalized approach to email marketing will foster a deeper connection between you and your audience, allow for higher open rates which lead to higher conversion rates, and reduce unsubscribe rates since the content they are receiving speaks directly to their needs.
Creating email groups within your email list is surprisingly simple, though it might take some forethought and planning. The three most popular email marketing platforms for our clients—MailChimp, ConvertKit, and MailerLite—make it easy, and each platform has its own unique features to help navigate and use interest groups within your audience.
Helpful Tips for Creating Subscriber Groups
To create your groups, tags, or segments, you’ll navigate within the platform to your audience list and look for prompts to create groups, segments, and/or tags. You can bulk add subscribers to an already created group, or you can assign groups, tags, or segments to an individual subscriber. The steps vary slightly between the email service providers, so be sure to refer to help docs in the one you use. We’ll highlight a few quick tips and steps below for using the three providers we help with most often.
Tips for Segmenting or Groups in MailChimp:
The first step with MailChimp will be to navigate to your audience dashboard and select “Manage Contacts” from the options. On the next page, you’ll see options for Groups, Segments, and Tags. Each of these can be used to group your subscribers together based on the topics of information you will share or based on how and when you communicate with them. For example, in our subscriber list, we use tags for clients, colleagues, hosting clients, marketing partners, and team members. We have segments created for client and service news, blog posts only, and partners. This allows us to send quarterly newsletters and service updates to our clients only, rather than our entire email list, and it allows our subscribers to choose to opt in for just our blog posts if they choose.
Groups work best when subscribers can self-categorize when they sign up for your newsletter or email list. With the recent addition of the Subscriber Preferences center in MailChimp, you can create a simple landing page or form to allow users to choose the groups they would like to join. You can provide a link to the Subscriber Preferences center in your welcome email to them as a new subscriber, or send the link in an email campaign throughout the year as a way to check in with your readers.
If you are organizing your subscribers manually, you might consider using tags instead. You can manage all of your tags on the Tags page, where you can create or delete tags, view contacts assigned to a given tag, and more. You can also use various tags to create new groups or segments of your email list, target subscribers for a workflow or customer journey, and more.
Tips for Segmenting in ConvertKit:
ConvertKit makes it incredibly easy to segment or divide your audience list. Where some email service providers such as MailChimp might require separate email lists or audiences based on interests, in ConvertKit, your one contact list can be divided nearly endlessly via tags, segments, and the forms you create. Every form or landing page can have an assigned tag; even links within your email campaigns can assign tags to subscribers when clicked. You can also categorize your lists based on demographics and behavioral data.
From there, you can use segments to communicate directly with subscribers in particular interest groups via broadcasts or automations. Segments in ConvertKit can focus on a single tag or a group of tags. We use these options quite often when launching a new release for one of our authors. For example, we’re able to create a launch team application form that assigns the launch team tag to applicants as they opt in. Then we can create an automated email to just the launch team applicants, providing necessary information for them as they begin supporting the new author. Then throughout the campaign, we can isolate those subscribers again to communicate news or promotions for them to share. While other providers offer similar resources, we’ve found that ConvertKit is the most seamless and simple to use, and definitely offers the greatest opportunity for growth. Develop your own strategy for segmenting your email subscribers to make communication work for you and your readers.
To get started managing your audience in ConvertKit, you will go to your account dashboard -> Grow -> Subscribers. From there, you’ll see options to create Segments or Tags and manage Subscriber Preferences. You can create a Segment that will automatically import users with an assigned tag or choose to communicate with the “tagged” subscribers directly with your next broadcast. There are so many simple and user-friendly options!
Tips for Segmenting in MailerLite:
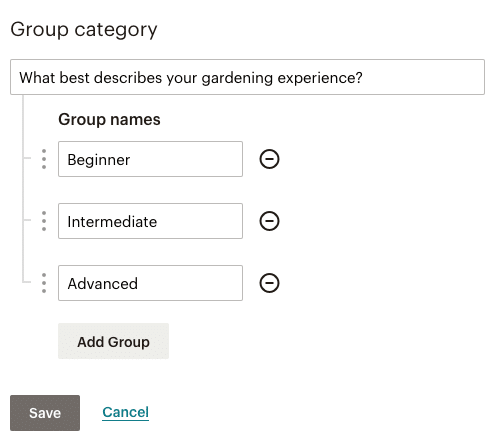
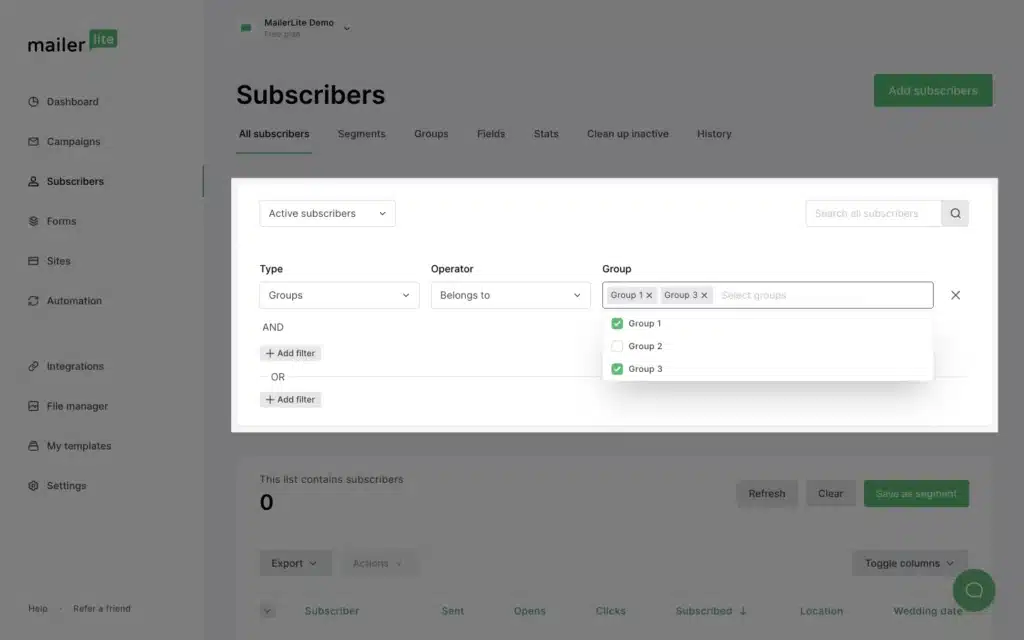
MailerLite is a little less intuitive than the first two providers we’ve discussed, but the same functionality is available. To get started with groups or segments, you will navigate to the Subscribers page in your account, click on Groups and then follow the steps to create the interest groups you want. MailerLite uses a search feature or filters to help you identify subscribers in particular groups or add them there as you choose. You can also assign groups to subscribers as they are imported, which is very useful if you host an event where attendees opted in via spreadsheet or signup form and you would like to followup with those subscribers specifically, for example.
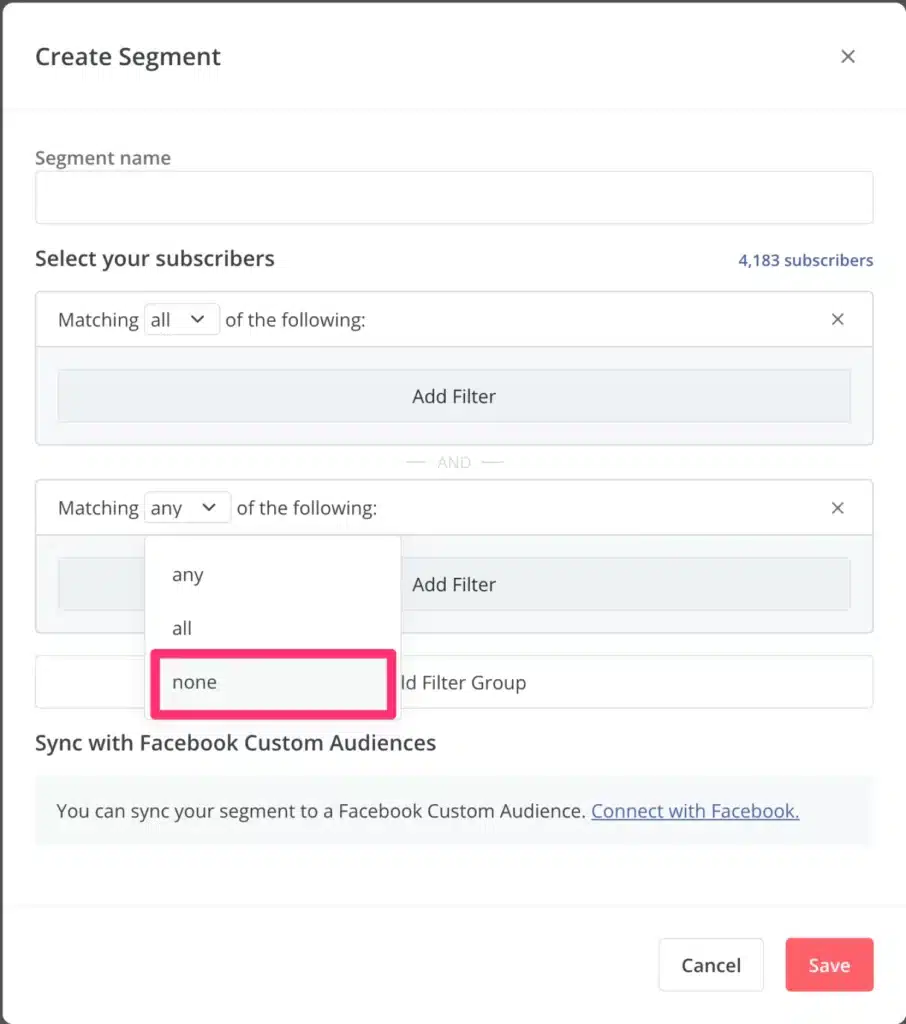
It’s important to note the differences between Groups and Segments in MailerLite. Per their definitions, a segment is created or managed by a “rule” or “condition”. Users are filtered based on this criteria, which then creates the segment of your list. Interest groups (which function more like tags in the other platforms) are based on “action” by the subscriber and don’t necessarily update automatically when that action or preference changes.
Interest groups and segments work together in MailerLite. You can group subscribers together to send more targeted emails or automations. You can also exclude certain segments or groups, rather than emailing your entire subscriber list.
Final Thoughts
Our #1 recommendation for you would be to utilize whatever features you have in your chosen email service provider to create user and interest groups that work for you and your audience. Don’t be afraid to test the options and then pivot if/when needed. That’s part of the growth process and your readers will appreciate the added effort that leads to a more personalized experience for them!
Not sure how to get started with user groups? Let us know – we’re happy to help!
This post may contain affiliate links. Read our full affiliate disclosure here.