Using captivating images in your blog posts is a huge way to draw readership to your website. Have you been there? You’re surfing through Pinterest and a bold, eye-catching image grabs your attention! It only takes one click and a new person is visiting your website.
Images communicate ideas and stir up a person’s emotions. If it is your desire to engage with your audience this way, you’ll want to pay close attention to the tips I share here for creating blog post images.
How do you create professionally looking graphics for your website when most bloggers are not graphic designers? I’m here to share with you some simple tools you can use to edit your photos and create professional looking images for your blog posts.

Websites That Offer Free Images
First you need images. Not everyone has a budget to buy high-quality, royalty-free images. If you are looking for free, public domain and licensed images, here are three websites I recommend.
Unsplash
This is a very popular site for free photos. I use this site often for everyday blog posts on my own website. This site releases 10 new photographs daily. It has an easy to use search bar to match what you are looking for.
For example, let’s say you are writing a post about the best tips for traveling with your family. You can enter travel or small children into the search bar. It is also good to type in multiple things, separated by a comma (travel, family, small children). My advice when selecting an image is to put a good deal of time into your search. Since this is a very popular website for free images, you’ll find that a lot of bloggers use the same favorite image. If you want your image to stand out, do your best at finding unique ones.
- Search for your photo
- Hover over photo and hit the download arrow button
- Save it to your desktop
Pixabay
This is another site you might like to try to find your perfect blog post image. It has a large amount of free images to choose from.
- Search for your photo using the toolbar at the top
- Double click on your image of choice
- Hit the green free download button to the right of the image
- Select your photo size (1920×1280 JPG is recommended)
- Save to your desktop
StockSnap
This is another great site for finding your unique blog post image! This site has sponsored images at the top that aren’t free, so make sure you scroll down to choose a free image.
- Search for your photo in the toolbar at the top left of the screen
- Click on your image of choice
- Hit the red free download button underneath the image
- Save to your desktop
Photo Editing Websites
There are many photo editing sites to choose from. Today, I’m going to share the three that I use most often. PicMonkey, Canva, and Pixlr. I will list some pros and cons for each, and then show you how to edit your photo using one of these websites.
PicMonkey
PicMonkey is a browser-based photo editing app. It is mostly used by aspiring bloggers and Instagram users.
Pros:
- Available as a web-based application and smartphone app
- Allows users to edit pictures and create blog graphics easily
- Considered a Photoshop alternative
- Ability to add designs to pictures without too many tools
- Provides a user-friendly photo editing toolbar with features like rotating, cropping, resizing, sharpening, picture exposure, and color saturation.
- Contains ability create overlays, texts, frames, and textures to images.
- Can save edited images to desktop, email, smartphones or tablets.
- A Pro Feature that is highly sought after is its background remover in one easy click! Pro members can also create their own branding kit where you can collect your favorite fonts, colors, logos, templates, and graphics into a single location in Hub.
- Partnered with Unsplash to provide free stock photos right from the editor feature.
Cons:
- No free options
- Pay for basic (7.99/month), Pro (12.99/month) or Team (33.99/month) plans.
- Sometimes the system has glitches and makes you reload
- Has an image size limit (no larger than 16MP – it will automatically resize to 4000×4000 pixels)
- PicMonkey photo editor is not always suited for professional photographers or people who want to design images on a professional level, with other photo editing software out there.
Canva:
Canva is an online software program that boasts of creative and stunning design features. Design in minutes with thousands of beautiful templates and images to choose from. Price points range from free up to Enterprise for 30.00/month. Canva offers three different pricing plans: free, Pro (9.95/month) and Enterprise (30.00/month).
Pros:
- Try it free for 30 days with the ability to cancel anytime
- Has free options
- Available as a web-based application and smartphone app
- Can make logos, cards, and social media infographics, book covers, business cards, and more!
- Does not put a watermark on its edited images
- Allows to save the exact editing size needed
- Offers over 60,000 templates to choose from
- Works on PC, laptops and Android
Cons:
- Not all features are free
- Some of its edited images are blurry and not always the best quality
- Quite complex to use
- Not always user-friendly
- Trouble using on an iPhone
Pixlr Editor:
Pixlr is considered one of the best editing software programs. This cloud-based set of image tools and utilities, containing a number of photo editors, a screen grabber browser extension, and a photo sharing service. A suite that was originally designed for non-professionals, however, contains a wide range of simple to advanced photo editing options.
Pros:
- One of the best free editing software programs
- Available as a web-based application
- Available as a smartphone app
- Gives a professional look to edited photos
- Easy to learn
- Free options
- Has a unique selling point for upgrades
- Large library of effects and photo editing filters
- You don’t have to download and install it on your device
- Has tools like double exposure, heal, auto fix, blur, darken, brighten, doodle, overlay, stylize, borders, stickers, etc.)
Cons:
- Not all features are free
- Some tools are not user friendly, such as the adjust size tool.
- A strong internet connection is favorable
- The pictures edited and saved are not always the best quality
- Could use a larger number of tools for better usage
I’ve only used the older version of Pixlr editor. This version requires you to enable flash, which will only be offered through the end of 2020. It will then be replaced by a newer version, Pixlr E. Pixlr E will have three different pricing plans: free, advanced (3.99/month) and professions (14.99/month).
A Step-By-Step Tutorial To Edit Your Photo
Here is a very basic, step-by-step tutorial for creating a blog post graphic. I will be showing you how to edit a photo using the free options offered through Canva.
Once you open the Canva site, you’ll want to sign up and create a free account. I signed up with Google. You may be able to sign up for a free 30 day trial at this step. If not, you’ll need to do this before saving your image at the end.
1. Click on the blue bar that says, Create a design.
2. Click on custom dimensions and put in a width of 800 px, and a height of 550 px. (This is just a suggested size you can use for blog posts. Be sure to set your image size to whatever works best in your website theme.)
3. Click create design.
4. Scroll down the left-hand side toolbar and find the uploads button and click on it.
5. Click on upload an image or video.
6. Choose one of your favorite photos that you’ve downloaded from one of the free websites we went over above.
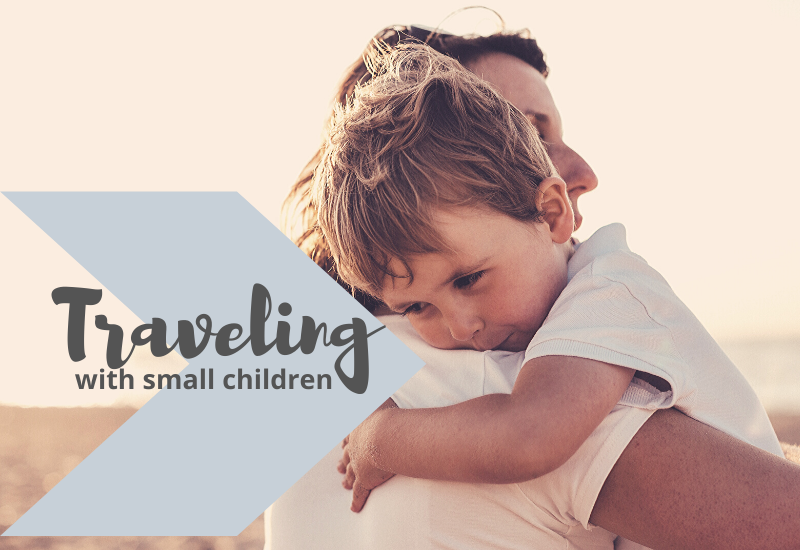
Here’s the one I chose for this example from the Unsplash website:

7. Drag the photo into the white area and use the arrows in the corner of the image to drag and enlarge the photo to fill the white space based on the dimensions we created.
8. Select the photo and then above it, choose the filter option. I’m going to use the Whimsical filter with an intensity of 30.
9. Next, we’ll choose an element to add to the image. You can find the Elements button along the left-hand side. I’m choosing the right arrowhead element found in the shapes section.
10. Drag and drop it onto the image. You can resize it using the double arrow when selecting any corner of the image. I’m going to drop in in the lower left corner of my image. You can edit the color by clicking on the image and selecting the color of your brand.
11. Next, we’re going to add some text by clicking the text button along the left-hand side. You can add a heading and subheading, or simply add an already designed font combination. I chose the Merry Christmas font combination.
12. Drag your cursor over the font template and change it to the text you want to use. You will be able to change the color of your font and the size. If you don’t like the placement of the subtitle section provided, simply delete that section and add a new individual subtitle. Now you’ll be able to drag in more closely to your main bolded text. I did that will this image. I wanted the subtitle with small children to be right under Traveling.
13. Lastly, download your image to your desktop.

I hope you enjoyed this post and came away with some valuable tools and resources to help you create image graphics for your blog posts!
This post may contain affiliate links. Read our full affiliate disclosure here.


