One of the things I absolutely love about the WordPress platform is that it is so super user-friendly. Almost all features necessary to publish a page or blog post are at the user’s fingertips. One super easy click is to add any image – whether from your phone or computer, or another URL – to your blog post or website page.
However, that click might matter more than you think.
Here are three quick but important tips for adding images to your blog post or page:
1. Resize and optimize the image BEFORE you upload it to your site.
We all know using beautiful blog images is key to pulling in your audience, encouraging them to share your content, and simply making things pretty. But if those images are not properly resized, they can be detrimental to your site’s overall health. If you’ve ever come close to maxing out the memory on your phone, or your computer is loaded down with large files or photos, you know how slow those devices can become, or how apps or programs will begin to struggle with even basic functions. Your website is the same way – if you overload it with large files, the database that houses your site will begin to load much more slowly and have even some of the most basic site functions break down or struggle. Because you want your site to always operate at its best, it is very important to only upload already resized and optimized images. Whoever is responsible for maintaining your site will thank you.
If you’re not sure how to resize the images, here’s a great tutorial with steps for a couple different photo editing softwares. The end goal is to upload your image to your site already at the size you will use it. In other words, if you need a 500 pixels wide image for your blog post, then resize the image to 500 pixels wide before uploading it, so WordPress doesn’t have to do the work of adjusting it down to the viewable size.
Bonus Tip: When you resize and save the edited image, title it something relevant to your post, page, or website. Also, add those important keywords to the image title and alt text in your media library! This helps give even your images a little SEO boost!
One other quick note about the image size, if it’s too large, your next “pretty” email to your subscribers will likely appear broken or stretched. So be sure to follow Step #1 and resize the image to whatever your email template requires – 600 pixels wide is pretty standard.
2. Insert the image into your post correctly.
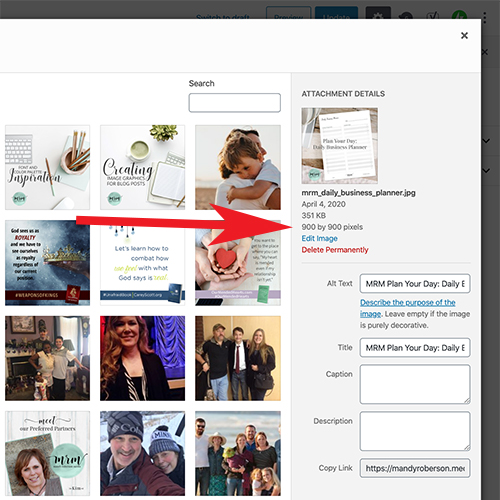
In the Classic Editor, when you click “Add Media” and choose the image from your device, if you look to the right side of your screen, you will see the following three options:
- Alignment: This allows you to choose if your image is left or right aligned, centered, or “None” (which means it won’t allow your text to wrap around it in either direction and won’t be centered either).
- Link To: This allows you to choose to let the image link to itself, an attachment page (a page with a link to the image), a custom link, or no link at all. (See next point for more.)
- Size: This allows you to choose the size that the image is inserted into your post or page.
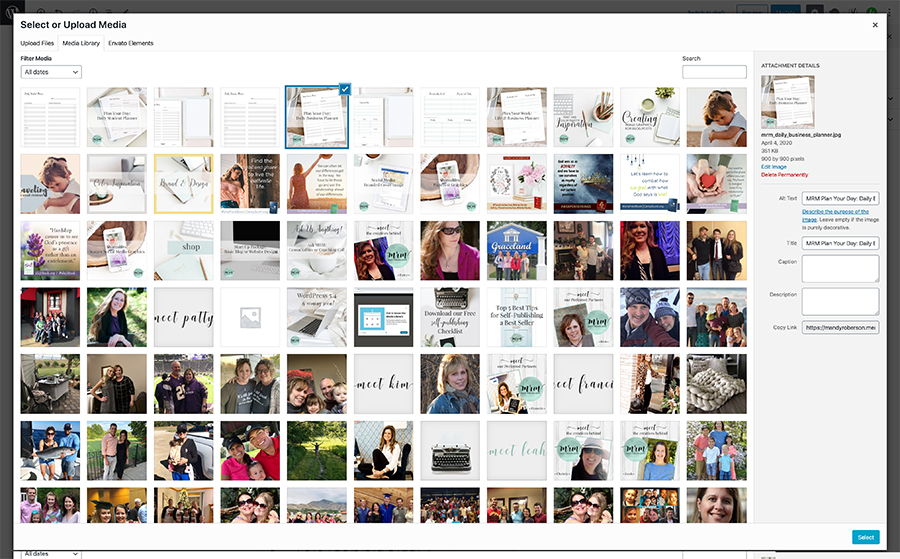
In the Block Editor, you will click the “+” sign to insert a block into your post or page, then click the “Image” option and choose to upload an image to your media library and then insert it, or insert an image from your media library, or insert an image from a URL.
When you select your option and your image, you can then click on the inserted image to set the alignment and link in the image block, and adjust the size on the right of your screen.

The alignment of an image is important to determine how your post or page will appear on various devices. Always preview your post or page first to be sure the image alignment or placement looks well balanced with your text. Don’t rely on the visual editor (the box where you compose your post) – always click at the top right to preview! If you can save page space, or dress up the post by aligning your image to the left or right of a long paragraph, then do so. If it’s a wider image that should stand alone, away from the text, then center it and add a line break above and below the image. Remember, the goal is to deliver a clean and visually appealing post to your visitors!
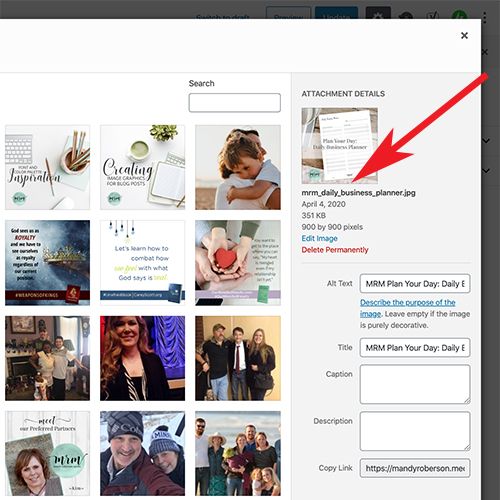
3. Use a custom link for your image.
Just like using a relevant image name is helpful for Search Engine Optimization (SEO) purposes, using a custom link for your inserted image is also super beneficial. Most “share” plugins for images within a post will grab the image meta information – that custom name you just gave it – and the image link when a user clicks to share or save the image.
When one of your readers visits your yummy recipe post from this weekend, and clicks the “pin it” button on that gorgeous food picture you added, Pinterest will look for the image name and description and what that image links back to when it saves that user’s new “pin”. The easiest way to be sure new readers find you through that pin is to link your image to the new blog post’s URL. If you have shortlinks turned on for your posts, that makes this step super easy as well. Just grab the post’s shortlink and use it as the custom link for your image.
Please don’t link an image to itself. I have tried, and I can’t think of a single reason why this would benefit your blog post. If an image is linked to itself, and then pinned on Pinterest or shared on Facebook, whoever clicks back to your site through those shares will only see the image, not your fabulous recipe or content. There are a few plugins out there that can be set to grab the post URL instead of the image link, but just don’t chance it (unless I’m the one setting up your plugins 😉 ). Really though – it’s not worth the risk, or the wasted click.
Bonus Tip: There are several different ways to create shortlinks for your post and page URLs. Because I use the JetPack plugin for a variety of other features on my site, I also use it to manage my shortlinks as well, and think that’s probably the simplest way to go. Also, the Block Editor allows you to grab the post permalink at the top, when you click in the post title block. Super simple!
And that’s it! Use these tips to properly insert images into your blog post or website page for optimal results!
What are your thoughts or tips? We would love to hear them!
NOTE: This post was updated April 2020 to incorporate details for using the new Gutenberg Block Editor.
This post may contain affiliate links. Read our full affiliate disclosure here.

I always love your tutorials. I will be saving this one for the future. I really liked your help with the custom link for my image. I have never done that! We need more of these tips!
You are such a blessing. So glad I found you to help keep my site beeeeeutiful <3
Aww. Thanks! Glad this was helpful for you, Carmen! I’m so blessed by you, and love working with you!